Showing posts with label Cooking. Show all posts

Monday, May 9, 2011

From Mother's Day weekend ...

Thought I'd share a few pics from this Mother's Day weekend.  I was able to fix a neat little meal on the Big Green Egg for the moms in our household.  Below are some photos of the yummy goodness.  Enjoy!  And try not to drool on my blog would ya?

What ARE these you might ask?  Why these are turtles.  Or turtle burgers, layered with cheese, and um, wrapped in a weave of bacon, and stuffed with hot dogs.  It's GOOD for you, trust me!  :)

The basic way to make these is weave the bacon, put down a hand-made burger patty down on it, cover the patty with cheese, then put ANOTHER patty on top of that. Add hot dogs between them to make the legs and head for the "turtle", then wrap the bacon "shell" around it all.  Toothpick things into place and you're good to go.  Season to taste.


So there are the "turtles" after prepping and on the broiler pan.  All ready to hit the Egg.


 And there is the mighty Egg, doing it's culinary magic.  This thing takes normal food and makes it taste like you're eating a baby angel :)  The gauge there is simmering right at 400 degrees F.


HOT off the Egg .. turtles!   And I mean these suckers were LAVA-hot!


Turtles are done and resting on the counter.  Ready to be put a burger-bun and scarfed!  These were still super-duper hot (which is really hot, btw) even after sitting for a bit before finally making to the table. 


And there is a last close-up to tantalize you before lunch time :)  These were a huge hit at our house.  The moms were definitely happy with the way these turned out.

Monday, October 5, 2009

Lambing it up .. OR .. What a crock


This weekend I made another trip over to the nice lady's website at Year of Crockpotting to look for more yummy ways to fix lamb in the crockpot.

I will come clean and say here that when I look for crockpot recipes, they must meet one primary criteria.

My goal is always to have ZERO preparation other than dice things, unwrap things, etc, and then simply dump into the crockpot.

What I mean by zero prep is that I can't be all cookin stuff in a skillet or some other flippety-doo before I put things in the crock. Hey if I wanted to work, I wouldn't be using a crockpot right? I require it to be easy-peezy-lemon-squeezy or I might as well spend an hour in the kitchen cookin stuff all regular-like.

What can I say? I'm lazy. And a guy. Perhaps those things go hand in hand.

Shush you.


The veggies I used were just a bag-mixed frozen vegetables. Also I diced up some taters, chopped an onion, and diced some garlic cloves. My dry rub was salt, pepper and rosemary which I mixed up right alongside my other "prep" work.

I hear you whining already. "Well how much did you use of this?" "How did you do that?"

Snap to there Private! Guys don't cook like that. We cook to taste. You do same. Taste good when do that way. Now scratch yourself and read on.

After following my simple lead thus far, next you just throw all the ingredients in the crock and walk away. (Well don't forget to turn on the crock. Not everything magically happens like building a cradle).

So that's it. Done and done.

When you come back in 7 1/2 to 8 hours, you have yummy for the tummy lamby-whammy (should have used that for a post title) that is fall apart fork-tender.

I know some folks that express concern over lamb "smelling" bad as it cooks. I've not ran into this yet. And this one didn't smell anything but "I'm very good but I'm still cooking and you can't have me yet". Yeah, that kind of smell.

Make this soon.

Wednesday, September 23, 2009

No weenies, just beanies ... OR Beans, beans the magical fruit

I've been looking for a really good bean recipe. Something that is "guy-easy" .. meaning you open things, dump things and heat things. Its how I roll when crockpot cooking.

This recipe, Cowboy Beans, from over at "A Year of Slow Cooking" is really good. It fits the bill for "guy-easy" too. Okay I had to chop and onion and brown ground beef.

I do admit that I was naughty and deviated from the recipe a bit. I had no dried pinto beans. I sub'd canned red kidney beans. Worked for me.

One thing more though.

Next time I make these and oh yeah there will be a next time, I will use less water methinks. I'd like them a bit more "stewie"/thicker. I admit I may have flat-out used more water than I should have though. I measure most stuff by eye.

So, in closing ...

This was easy.
It was good.

If you like beans, make this soon. You will enjoy it. I have spoken.

Saturday, August 29, 2009

Grilled Cheese Pizza Style .. OR .. Too good to be this easy

Okay someone else out there has probably done this recipe before but I just threw this together in the kitchen and wanted to jot it down. It was a big hit, even with my picky eater, Thing One.

Grilled Cheese - Pizza Style
2 - slices mozzarella
2 - Tbsp pizza sauce
12 (or so) pepperoni slices (we like turkey pepperoni)
2 - slices of bread
pinch of garlic powder
pinch of pizza seasoning (optional)

My method:
First I preheated the pepperoni in the microwave to make sure they flattened out nicely. Just makes for an easier build in my mind. But I suppose this step is optional.

Heat up your cast iron griddle (for cast iron is the bestest thing on which to cook, imo). Melt about 1 Tbsp of butter on the griddle. Apply some butter to your bread and place on griddle. Put the sauce onto the bread and sprinkle on the garlic and pizza seasoning (if you opted for that).

So then the build goes thusly: bread/sauce/cheese/pepperoni/cheese/pepperoni/sauce/bread.

Continue grilling the sandwich just like you would a regular grilled cheese. This is good stuff and very quick snack for the win. :)

Thing One liked this so much he actually STOPPED PLAYING VIDEO GAMES to sit down and eat. That's the only review I needed to let me know this is a keeper!

Saturday, July 4, 2009

Cooking: Have a Chile Burger


Burgers are my very favorite meal. What can I say, I’m easy alright?

I watch the show Diners, Drive-Ins and Dives now and then. Its basically a show where this guy (named Guy) travels around the country, finding THE very coolest and bestest places to eat. They are usually the classic ‘mom and pop shops’. That’s the part I dig about it. The food ain’t fancy but rather the kind that keeps folks coming to the same diner for 25 years.

I love that kind of tradition.

A few shows ago, they did a special on burgers. I refrained from drooling too much long enough to jot down this basic recipe for this particular kind of burger. I say "basic recipe" because clearly they didn’t give away all of their secrets so this is my interpretation of it. It’s currently my favorite way for a burger to be done right now. If you like spicy food, and if you like burgers, try this, you’ll like it.

Grilled Burgers with Chiles

1lb of ground beef
Chopped green chile peppers
American cheese
Buns
Pickles
Mustard
Salt
Pepper
Garlic powder
Bacon

Prep and Cook
I like to mix the spices in with the ground beef. That way you get flavor through and through. Salt, pepper and a bit of garlic powder – all to taste - is really all this needs.

Make out the patties and grill them. While the patties are grilling, grill the bacon too, top shelf if you have one - otherwise just watch it closely. After the first flip of the burgers, add the buns to the grill (also on the top shelf). Let them grill while the 2nd side of the burger cooks.

At this point, also add about 1sp of chiles to each burger, spreading the chiles out until the cover well. Let the burgers finish cooking. As soon as they are done remove them from the grill and immediately add cheese over the chiles so it can melt.

The Stack
Everybody who is a true fan of burgers is particular about how they are stacked. This is the order in which I do it from top bun to bottom:
  • Top bun
  • Bacon
  • American Cheese
  • Chiles
  • Yummy burger patty
  • 2-3 pickles
  • Mustard, spread thinly (to hold the pickles in place)
  • Bottom bun
The picture above is how a couple of these beauties turned out. I regularly write down burger recipes as I come across them. I'll be sharing more of them here throughout the summer.

Saturday, May 30, 2009

For 99 Its Tuna Salad Time

I saw two cans of tuna on the counter. Inspiration jumped out of the cabinet and before I could even think, I was caught up in creating this recipe. See, I didn't know how to make tuna salad from scratch. So apparently the muse of the kitchen thought I needed to learn.

Naturally I turned to my trusty laptop and google - the source of all answers and opinions for planet Earth. Someone should really do a Discovery Channel special on that - something like Nerd Earth: The Collective Mind - instead of that Planet Earth stuff they do, I mean really, who goes outside anymore right? :P

But I digress .. as usual. I mean I'm always trailing off onto other subjects instead of sticking with the topic at hand. Wow, you should see this bird outside - it's pretty. Hold on ...

Okay back. Um, reading my post thus far, looks like I owe you a recipe. Here goes. The end of my tale is that I made this one up from my own brain and partially based on what I found in several other internet recipes.

I really really like it. It was spoon lickin good .. I mean like when you're making a cake and you just have to lick the spoon .. that kind of good. But maybe I was just in the mood for tuna salad.


Rob's Tuna Salad Sandwich Recipe

Ingredients
  • 2 (5-6 ounce) can of tuna fish (if packed in water, drain it, and add a teaspoon of good quality olive oil)
  • 2/3 cup of cottage cheese
  • 4 Tablespoons of mayonnaise
  • 1/2 red onion, chopped finely
  • 2 Tbsp of Jalapenos
  • 1 tsp Red Cayenne Pepper
  • 1 tsp Garlic Powder
  • Juice of half of a lemon (or to taste)
  • Pinch or two of dill
  • 4 Tbsp minced fresh parsley
  • 2 tsp of Dijon mustard
  • 2 hard-boiled eggs, finely chopped
  • Salt and pepper to taste

(optional - lettuce and sliced tomatoes)

Slices of bread (French would be good but I used some home-made bread), lightly toasted

Method

Mix all of the ingredients. Serve on toast, either open faced, or in a regular sandwich with lettuce and tomatoes.

Yield is about 6-8 cups .. honestly I'm not sure. Our Pyrex bowl has it printed on the bottom inside the bowl .. which you could read from the bottom .. if you could read it backwards, while upside down, trying not to spill the bowl of tuna salad, with a German Shepherd watching you, hoping for failure.

Just get a big bowl okay?

The things I go through for this blog. :)

Monday, May 25, 2009

Grilled Breakfast Wraps

The other day I threw together a little something for breakfast that turned out quite well. The backstory to this is super-duper short so I'll share it with you. Basically I was scrambling eggs for breakfast and suddenly it occured to me to turn them into grilled breakfast wraps. Here's what I did.

Mission Whole Wheat Tortillas
Scrambled Eggs
Sausage
American Cheese
Shredded Cheddar Cheese

I took part of the eggs I'd mixed up and did an egg wash on each tortilla. Then I added the stuffing, which in my case was American Cheese, sausage, and eggs. I wrapped the tortilla up tight, the egg wash makes a nice "glue" holding it shut very neatly.

Then I tossed them on the griddle, watching for the cheese inside to melt. Flipped em once and grilled the other side till they looked done to my very hungry eyes.

Then once off the griddle, they got a dash of shredded cheese and the remaining scramble/sausage left over from my mix was added as a side.

Clearly there is much more you can do with this. I'm not a fancy cook and I know this wasn't ground-breaking but it sure was good. The egg wash was what I really wanted to recommend. It really holds things together and then gives a bit of extra flavor to the tortillas while making them crisp up nicely too.

You could totally make these veggie-wraps with some light cheese, maybe mozzarella, and still get by pretty healthy. That's one of my next ones to try.

Enjoy!

Sunday, May 3, 2009

Hey Dip ... it's for your chips!

I wish I could say that I thunk this one up but I daren't lie about something as holy as cooking lest the food-gods find some way to punish me from their golden-kitchens atop the summit of Recipe Mountain.

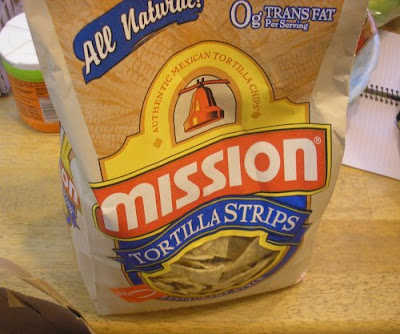
So even though I didn't create this, I am glad that I found it. Heather found some really good restaurant quality tortilla chips by Mission foods. So I took up the challenge to find some extra good chip dip of the same quality with which to surprise my wife. I know that she loves a good dip ... hence her sticking with me ... and so I turned to my best nerd-tool, Google. I found this recipe which we certainly believe is a keeper and well-compliments the chips. No it's not healthy as all get-out .. ok, it's not healthy at all I imagine but oh-so-very-nummy-nummy that you can just eat it up. Actually this is what had for dinner last night. If you like chip-dip, give this a whirl, it's very easy to make.

Beefy Taco Chip Dip

Serves 16

Ingredients:
1 pkg 8 oz of Cream Cheese, softened
1 cup of sour cream
3/4 cup of mayonnaise
1 pound of ground beef
1 pkg of taco seasoning
1 can (8 0z) of tomato sauce
2 cups of shredded cheddar cheese or taco cheese
4 cups of shredded lettuce
2 medium tomatoes, diced
1 small onion, diced
1 medium green pepper, diced

tortilla chips

Directions:
In a small bowl, beat the cream cheese, sour cream and mayo until smooth. Spread into a 12 to 14" pizza pan or serving dish. Put in fridge for 1 hour.

In a saucepan, cook the beef, then drain. Add taco seasoning and tomato sauce; cook and stir for 5 mins. Let cool completely. Spread over the cream cheese layer and put it all back in the fridge.

Just before serving, sprinkle with cheese lettuce tomatoes, onion and green pepper. Serve with chips.

Notes and things I did differently:
I skipped the green peppers. I like them but I like jalapenos better. So I used diced jalapenos. Additionally before serving I warmed all this up in the oven, about an hour on 170 degrees cause we were busy doing other things. After an hour it was ready to just mix all together, pour some portions into little serving bowls and serve with a generous side of chips. We like our chip-dip (well this one anyway) warm - kinda like how you make haystacks - and this was really really good warmed up for serving. Though I'm sure tis great cold too. That's for lunch today.

Sunday, April 12, 2009

Welcome back grilling season - how I've missed thee


Not an earth-shattering blog post but hey they can't all be blog award-winners right? Um actually none of my posts have won any awards but regardless - I'm still very glad to be grilling outdoors again.

Tis still a bit chilly here, less than 50 degrees, but man I couldn't wait to fire up the grill again. Currently my charcoal is stacked in my grill's chimney with care, in hopes that .. wait, wrong story ...

The burgers are resting all snug on their trays, with visions of ... dang it!

Ok. Burgers are ready to cook - finely seasoned and I even mixed the steak sauce into the patties (yummo) - the grill is warming up and the crinkle-cut fries are all seasoned and ready to pop into the oven.

It's gonna be a good evening.

Top it all off with a tall glass of tea and good movie ... and sim sim salabim .. the magic of a great evening at Castle Horton has begun - wish you could join us!

Sunday, February 15, 2009

Behold the Lamb ...of Crock


I loves me some lamb. Here is a new recipe that I'm trying out in the crock for tonight's dinner. I put it on to cook at 10:30 this morning. Should be yummy.

UPDATE: We really liked this! Josh wasn't a fan of it but Heather and I really enjoyed it. It's going to be a keeper. Lamb is pricey in our area so we won't fix it often but it will be a nice treat from time to time. Very good with just a nice amount of heat. Really good with salad too.


Jamaican Curried Lamb

Ingredients:

  • 2 tbsp. cooking oil

  • 1 1/2 lb. boneless lamb, cut in 1 inch cubes

  • 2 lg. onions, peeled and finely sliced

  • 2 tsp. allspice (ground)

  • 1 1/2 cup stock or bouillon

  • 1 tbsp. wine or cider vinegar

  • 1 tsp. curry powder (or more)

  • Salt to taste

  • 1/8 tsp. cayenne pepper

  • 1 whole habanero pepper, cut top off and discard seeds


Preparation:

Sear lamb cubes in a skillet over medium-high heat.
Remove lamb; cook onion in oil until soft but not brown.
Transfer to the Crock Pot; add remaining ingredients, stirring to combine.
Cover and cook on low 8 to 10 hours. I got a late start on mine. I cooked it on high for 2 hours, then on low for like 4-5 more. Turned out great still.
Discard habanero before serving.

Serves 4.

Monday, February 2, 2009

Quickie: Chicken recipe

Since the Christmas break I've been doing a lot more cooking. With Heather feeling down here lately due to the impending birth at Castle Horton, I've been left in charge of the kitchen more and more. God help us all right? I hope when Heather returns to her kitchen that she can still find everything too :)


So following in my friend Jenn's footsteps, I've been menu planning and shopping accordingly. And the crockpot has been my very favorite tool for cooking of late. Although us being only a family of three, I've way overdid it on the cooking and we've had far far too many leftovers.


So today I made some crockpot chicken. Turned out great and was super easy. Heather is a picky eater and she even loved it. Josh not so much. His powers of being picky far outmatch his mother's formidable finickiness it seems.


However, I wanted to share this yummy little chicken number. It's cheap and it's easy. It's a lot like dating me would be.


Smothered Chicken


Ingredients:
  • 4 chicken breasts, skinless & boneless
  • 12 oz Baby Bella mushrooms, sliced
  • 1 can Cream of Chicken Soup
  • 1 can Cream of Mushroom Soup (once again, fat free here!)
  • 1 can French Onion Soup
  • 1 Large onion, sliced
  • assortment of vegetables
Directions:
  • Cut the chicken into bite size chunks and quickly brown in a small amount of olive oil.
  • Remove from pan, set aside and brown onion until almost soft.
  • Add mushrooms and saute for additional 5 minutes.
  • Layer vegetables in bottom of crock, add some of the onion/mushrooms, then all of the chicken.
  • Top with rest of onions/mushrooms.
  • Empty all three soups into saute pan.
  • Stir and deglaze thoroughly then pour over chicken.
Cook on high for 2 hours, then on low for another 2-1/2 hours.

Tuesday, January 27, 2009

Quickie: How many beanies can you eat?


Occasionally, rather than ramble on and on (yes I'm trying to do better with that resolution), I figure I'll throw in a "quickie" post. Hey who doesn't enjoy one of those from time to time right? Pervs. Clearly I meant concise and informative posts :)

Okay I just made this 16 bean soup today. It is delish! You simply must have some soon. However I added some stuff to this. It's this illness I inherited from my mother. Neither of us can ever make the same pot of soup twice. It always ends up being "mood food"; meaning depending on our mood, we flavor it totally different although the base is the same each time.

I only added some hot peppers, black pepper and some peas. Okay I really like peas alright? And spicy food is my life.

Thanks to my very good friend Jenn and her food blogging talents for showing me the way of the soup and introducing me to crockpot cooking, in general, and this recipe in particular. I slammed all this in the crock this morning and like elven cooking magic, dinner was ready when I got home. It's a beautiful feeling.

Monday, December 29, 2008

Boom bam it's Baklava Baby!

Well after eating me words and becoming a big fan of Alton Brown (always late to the party though I am) I decided to give a recipe of his a shot. Never being one to back down from a challenge, I decided to go with something that seemingly, a lot of folks say is difficult

Baklava

Ok I admit that prior to this recipe, I'd only heard of baklava in the movie Alladin with the big blue genie does his first musical number .. sheltered live I have lived yes, hmmm?

So after watching Alton's show on this and hearing him say this didn't need to be a scary thing but that most people still avoided it, I took the challenge. Never being afraid to cook, I decided to make it, asked my lovely wife to buy the ingredients for us to work on it together, determined to blog about it later and finally flew into the kitchen with some notes from the show with intent to take pictures for the blog come hell or high water.

And here it is. Many thanks I have to give to my lovely wife for all her help on this. For while my drive to create is strong, my patience is not always so much and she balances me out, keeps me in line and has saved many a project by calming down my stressfulness. This was one of those times. Because not everything turns out like it does on TV :)

This didn't turn out exactly how I wanted it to so it will win no presentation awards but it. is. very. good! Basically after all our preparation we still had trouble with the filo sticking together. We think it's because we used organic filo so next time we'll just use the regular stuff and see if it behaves differently.


Baklava (ala Alton Brown)

Have your 1lb of filo in the freezer before beginning anything else. You should get it from the store and to your freezer, keeping it as frozen as possible along the way. Keep it there until you're ready to use it.

Supplies
9x13 baking pan
Sharp knife
1 lb of Filo
2 sticks or 8 oz of clarified butter (for applying to filo and baking pan)

Nut/spice mix
6 oz of blanched almonds
6 oz of pistachios
6 oz of walnuts
2/3 of a cup of sugar
Cinnamon sticks (5 inches worth); use true cinnamon, the lighter colored stuff (Cinnamomum Zylanicum)
Allspice 15 pieces to grind up

To make the nut mixture .. grind up the cinnamon and allspice. Then mix in with the rest of the ingredients and pulse the blender till everything is well mixed together.

Spritz
1/3 of a cup of clean water
1 tsp of rose water

Syrup
1 1/4 cups of honey
1 1/4 cups of sugar
1 cinnamon stick
1 orange peel

1 1/4 cups of water.

Prepared the nut/spice mix and spritz as outlined above. After that you should have at your station the following: the nut mixture, the clarified butter, the spritz, your pan, your knife and a clean place to work.

Remove filo from freezer and place directly into the microwave. Cook it on high for 60 seconds. This will thaw it enough to work with.

Now it's important to focus and work quickly. No interruptions here are a very good thing.

Layout all filo on your work area and set your pan on top of it. Trim around bottom of the pan with your sharp knife. This is to size the filo layers to your pan.

Butter your pan. Don't forget the corners.

Lay in your first sheet of filo into the bottom of the pan.

Drizzle butter onto the filo sheet. Then spread it out, working toward the edges to keep from catching an edge and rolling it up.

Do 9 more sheets just like this for a total of 10 sheets stacked on top of each other.

Take 1/3 of the nut mixture and spread evenly over the filo. Don't pack it down just spread it out gently with your fingertips.

Spritz it.

Do 6 more sheets buttering each filo sheet as before.

Then more nuts.

Spritz em.

Then 6 more sheets and don't forget that butter.

Then use the last 1/3 of nuts.

Spritz them.

Then use 8 more sheets of filo, buttering each.

This gives a total of 30 filo sheets.

Bake this in the oven for 30 mins at 350 degrees.Then cut into squares. Be careful, the top layer of filo will crack but thats alright, the syrup later will fix everything.After cutting, bake for 30 more mins at the same temperature.

Make the syrup while you wait for your last baking session to be over.

Mix all syrup ingredients together and bring to a boil. Maintain it for 10 mins. Then remove the bits and pieces from it. Using immediately is preferred but if you let it cool, just heat it back up again before applying to the baklava.

Back to the baking.

After the baklava has baked for it's last 30 mins, let it stand for 2 hours. Then retrace your cut lines.Add hot syrup to it, all of it. It will look like there is way too much syrup but the baklava will absorb it (well most of it).

Let it all set for 8 hours.

Enjoy.

Saturday, December 27, 2008

Your eggs are firm and hot

Alrighty I'm not a Food-O-Phile, I just like to talk like one :) Here is a recipe that I certainly sank my teeth into. For Huevos Rancheros - I'd had this on my mind for weeks and just got to try my hand at it today, it was super-easy.

I really enjoyed cooking this and it turned out to be a big hit. Even my wife who is nearly pure carnivore (love you dear) liked this, although it was a tad spicy for her. We're working on that though :)

I'm looking for a salsa though that I can make at home without tomatoes. Tomatoes I can take or leave and besides I have a good friend that really enjoys spicey food but isn't a big fan of tomatoes either. So if anybody has a recipe, I'd sure be happy if you shared. :)

Okay here is the recipe already ... stop yelling at me :) And here is what mine looked like right on our good ol' stove top. This was right after I had emptied the last pan, set the plates, and finished cleaning the kitchen. I'm kinda anal that I clean up as I go so that when I'm done cooking there is no work left to do, only food to enjoy. Yes, I'm strange.


Huevos Rancheros


Ingredients

Olive oil
1/2 medium onion, chopped (about a half cup)
1 15-ounce can whole tomatoes, preferably fire-roasted, if you can get it (or 1 -2 large fresh vine-ripened tomatoes, when in season)
1/2 6-ounce can diced green Anaheim chiles
Chipotle chili powder, adobo sauce, or ground cumin to taste (optional)
4 corn tortillas
Butter
4 fresh eggs
2 Tbsp fresh cilantro, chopped (optional)


Method

1. Make the sauce first by softening the onions in a little olive oil in a large skillet on medium heat. Once translucent, add the tomatoes and the juice the tomatoes are packed in. Break up the tomatoes with your fingers as you put them in the pan. If you are using fresh tomatoes, chop them first, then add. Note that fresh tomatoes will take longer to cook as canned tomatoes are already cooked to begin with. Add chopped green chilies. Add additional chili to taste, either chipotle chili powder, adobo sauce, regular chili powder, or even ground cumin.


2. Bring to a simmer, reduce heat to low, and let simmer while you do the rest of the cooking, stirring occasionally. Reduce to warm after it has been simmering for 10 minutes. Add salt to taste if needed.

3. Prepare the tortillas. Heat the oven to a warm 150°F, place serving plates in the oven to keep warm. Heat a teaspoon of olive oil in a large non-stick skillet on medium high, coating the pan with the oil. One by one (or more if your pan is big enough) heat the tortillas in the pan, a minute or two on each side, until they are heated through, softened, and pockets of air bubble up inside of them. Then remove them and stack them on one of the warming plates in the oven to keep warm while you continue cooking the rest of the tortillas and the eggs.

Fry the eggs. Using the same skillet as was used for the tortillas, add a little butter to the pan, about two teaspoons for 4 eggs. Heat the pan on medium high heat. Crack 4 eggs into the skillet and cook for 3 to 4 minutes for runny yolks, more for firmer eggs.

To serve, spoon a little of the sauce onto a warmed plate. Top with a tortilla, then a fried egg. Top with more sauce, sprinkle with cilantro if desired.

Serve either one or two eggs/tortillas per plate, depending on how much you want to eat. I'm a 2-egg to 1 tortilla person myself.

Makes 2-4 servings, depending on your appetite.

Friday, December 26, 2008

Alton Brown ... concerning eating my words

Some of you have probably been hopeful for a post like this :) So here it is, read on and enjoy ...

Today I watched Alton Brown's show Good Eats, for the first time and gave it an honest chance. It was an older show, concerning making Christmas cookies and he was in the kitchen, in his pajamas with Santa Clause on Christmas Eve. The show was .... great :) I had a LOT of fun with it, learned some things and Alton Brown really kept the whole showing moving along instead of just standing there "cooking" and droning on and on like your typical cooking show can get at times. I was suprised; and pleasantly so.

I especially liked the uses of technology in the show, particularly when they display information on the screen in the form of helpful tips, oven temps, etc. It didn't distract from enjoying the show and really helped you learn what they were trying to convey. Hey I'm a geek and I notice these things alright :)

So why am I writing this post anyway?

See the first few times I caught snippets of Alton Brown on TV, I guess I'd just caught it on the wrong day or something. But sometimes, like grandma said, if you try something and don't like it, wait a little while and try again .. maybe your "taster" will change. Grandma was full of good advice like that. And so because of thoughts like that which rattle around in my head and the fact that I have some very good friends that recommend the show, I gave it another shot. See awhile back I was talking with friends of mine who watch this show and I wasn't very nice about Alton Brown although, I honestly meant it all as just teasing at the time. But I think they questioned perhaps as to whether all my cogs were properly in alignment.

So after having watched Alton Brown's show, I gathered my ingredients for this blog post, which consisted of a pinch of "I was wrong", followed by 2 heaping cups of "you guys were right". Those are the two main ingredients in Humble Stew. :) Over the years I've learned to keep them on hand since I eat this dish often it seems.

So there we have it I think. A postive review of a show I was wrong about mixed in with an "I'm sorry I didn't listen and get into this geeky show sooner". ;)

P.S.- I mave have to moderate the comments that I know are coming ... sheesh ... ah well, the feedback flak is the garnish for Humble Stew after all :)

Wednesday, December 24, 2008

Merry Christmas .. *hic*!

Okay I haven't tried this yet, its currently "chillin" in the refridgerator. But here is a pretty good looking eggnog recipe for those of you who might like you some 'nogg. I'll let you know if its any good after it's 1-2 hour chilling time ... okay 3-4 hours if it's really good and turns out I need a nap afterwards.

And THIS is the reason I've recently bought some rum, NOT for long distance tech support with a certain blog site .. cough, Jenn, cough :)

Indulgent Eggnog Recipe
6 eggs
2 + ½ cups heavy whipping cream
2 cups whole milk
1 cup caster sugar
½ cup brandy
½ cup dark rum
½ teaspoon vanilla extract
½ teaspoon nutmeg, ground or grated (fresh is best)

Rob's note: First a word on what the heck is caster (or castor sugar). Its very very fine sugar, from Britain, that mixes well with cold beverages, meringues, etc. It is sold here in the US sometimes as "superfine" sugar. I know this not because I'm so smart but because I looked it up. So I'll save you all that heavy clicking. You can make your own caster sugar from regular granulated sugar by crushing it or chopping it in a food processor. Now don't you feel smarter?

Instructions
Begin with pre-chilled ingredients for the greatest end result.
In a medium bowl, beat the eggs together hard until they're very frothy.
Add sugar and continue beating.
Sprinkle in nutmeg and vanilla.
Continue beating.
A little at a time, add in the whipping cream, continuing to beat.
Again, only a little at a time, beat in the milk.
Finally, beat in the rum and brandy.
Give your arms a break from all that beating by putting the eggnog in the fridge to chill for 1 – 2 hours.
Serve cold.
Yields: 1 1/2 quarts (approx)